Wednesday, July 31, 2013

SRAM XX1 Chainring | Deconstructing how it works.

By now, you may have heard SRAM XX1; and while this actually refers to a whole line-up of SRAM components, most, if not all the buzz about XX1 is revolving about the concept of using a single chain ring drivetrain on the cranks. 


More to the point, the XX1 chain ring has been developed so that chainsuck* is all but a thing of the past.   

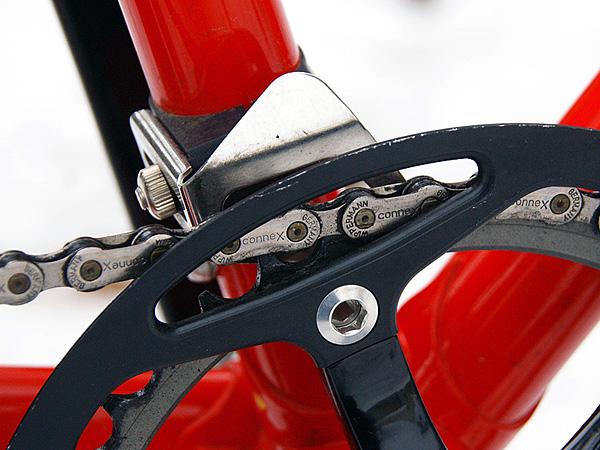
SRAM went back to the drawing board on the new chain ring design and uses very precise "cut" steps to alternate thickness on every other chain ring tooth, creating a well-matched interface between each inner and outer plate of the chain itself.   

This creates a "hugging" action between the chain and chain ring which helps to keep the chain in place.   If you look more closely, the teeth are also taller than normal, to also help in the event the chain does become a little slack. 


KING OF THE RING

Developed for maximum chain control, each tooth’s thickness is precisely CNC-machined to support the chain’s inner and outer links perfectly. Six available chain rings (28-30-32-34-36-38) allow you to tune your gear range to match your terrain, wheel size and riding style. Each X-SYNC™ chain ring fits a single, universal spider—allowing you to change rings without removing the light-weight carbon crank arm.
  • New tooth profile alternates thickness by inner and outer links, providing maximum chain control
  • Carbon arms with forged aluminum spider
  • CNC-machined rings (28-30-32-34-36-38)
  • New spider design allows for easier ring changes
  • Wide/narrow Q factor cranks for BB30 and GXP
  • Weight: 650 grams with BB
The reports on SRAM's XX1 chain ring set-up have been more than favorable! Over and over again folks have been able to enjoy their favorite rough terrain runs knowing that their chain will be staying put.  As of the time of this write-up, we haven't yet had any personal experience with the system, but it has peaked our interest and after some research, it know on our radar.

What did people do before SRAM XX1? 

For years the mountain bike community has been dealing with chainsuck by adding gadgets to retain the chain from moving off the chain rings.  IE: chainguides, N-JumpStops, etc. 

Alternatives to SRAM XX1?

Well, yes there are some alternatives, some companies like RaceFace  are now joining the party with their own versions of the "no-jump" chainring; but mostly, the main alternative is still in the form of the guides and stops linked above.  

"*Chainsuck is defined as the moment your chain looses enough tension to physically jumps/drops off the crank chain rings; sometimes this means it falls to the gear below it,  while other times it may jump off to the outside or inside of the chain ring landing on the frame or crank arms."

Have questions, comments, or better intel?  Let us know!

Tuesday, July 30, 2013

DCR Townhall Public Meeting @ PSP: IMBA Mountain Bike Ride Center Aug. 1 @ 6pm

 8/1: Please Share this with you friends! 
Straight from Friends of Pocahontas State Park, if you want to see the IMBA Ride Center happen at PSP, a must is having a SOLID showing from the mountain bike community at the DCR townhall meeting!

It's imperative for the MTB community to show up in support to change the master plan regulations that will allow for the IMBA Ride Center to be installed at PSP!

August 1st, that's 8/1 @ PSP's Heritage Center @ 6pm sharp


Virginia Regulatory TownHall Meetings

Friday, July 12, 2013

Road & Cyclocross Handlebar Width

Handlebar width can have a profound effect on your cycling; from how well your bike handles to how well you can breath.  Handlebars come with many features that add to the experience, but before you can worry about those, it's utterly important to have a bar that fits your body first.

While there are many brands of handlebars, each having many models and each of those having many options, the basics will always remain the same.  Your first choice should always be the one that provides the best fitment, and that begins with handlebar width.

The concepts to finding your correct handlebar width are easy enough, it just takes a few minutes at home or at your local bike shop.  As a side note; these are just "suggested" starting points for your handlebars, while these steps are likely to provide the comfort and efficiency to your ride, you may end up deviating to your personal taste.

Two methods for selecting correct handle bar width: (image right)

A) Simple Method
Select a few handlebars and have them placed against your back so that the ends of the handlebars are being are meeting up with the back of your shoulders.

The idea is that the outside edge of each side of the handlebar should span the complete width of your shoulder, with is approx. 3/4" inside of the leading edge of your arm.  Or better put, the handlebars should meet up with an imaginary line if drawn straight up from your armpit.

Once you are comfortable that you have located the correct width handlebars, you can now focus on style, tube material, shapes, etc.

B) Measure Method
Using the measure method, you are actually using the exact measurement (in cm) and add 2 cm for a final handlebar width.  measurement  ___________ + 2cm = handlebar width.  (Inches to cm = 1" for every 2.5cm)

Locate the peaks of the bony protrusions just above your chest where your arms and collarbone meet. With a measuring tape, locate edge of right protrusion and measure the span to the outer edge of the other peak.  If you have a partial size, always round up to the next nearest cm.

Now that you have your width, the rule of thumb for your handlebar size is shoulder width plus 2 cm.   So, if you measured out to a 41.5cm,  you would round up to 42cm and then add 2 cm for
a total width of 44cm handlebars.  

*Important side noted: Not all handlebars are measured equally, a handlebar should be measured the same as your shoulders, from center to center.  When measuring a handlebar, this means the center of each tube at the bottoms of the drops (aka horns) like the image to the left indicates.  Some brands measure bars from end to end, if you are not sure, ask your local bike shop for guidance.

We hope this helps you on your next handlebar purchase and makes your riding more comfortable!