Showing posts with label Cycling Gear. Show all posts

Wednesday, July 31, 2013

SRAM XX1 Chainring | Deconstructing how it works.

By now, you may have heard SRAM XX1; and while this actually refers to a whole line-up of SRAM components, most, if not all the buzz about XX1 is revolving about the concept of using a single chain ring drivetrain on the cranks. 


More to the point, the XX1 chain ring has been developed so that chainsuck* is all but a thing of the past.   

SRAM went back to the drawing board on the new chain ring design and uses very precise "cut" steps to alternate thickness on every other chain ring tooth, creating a well-matched interface between each inner and outer plate of the chain itself.   

This creates a "hugging" action between the chain and chain ring which helps to keep the chain in place.   If you look more closely, the teeth are also taller than normal, to also help in the event the chain does become a little slack. 


KING OF THE RING

Developed for maximum chain control, each tooth’s thickness is precisely CNC-machined to support the chain’s inner and outer links perfectly. Six available chain rings (28-30-32-34-36-38) allow you to tune your gear range to match your terrain, wheel size and riding style. Each X-SYNC™ chain ring fits a single, universal spider—allowing you to change rings without removing the light-weight carbon crank arm.
  • New tooth profile alternates thickness by inner and outer links, providing maximum chain control
  • Carbon arms with forged aluminum spider
  • CNC-machined rings (28-30-32-34-36-38)
  • New spider design allows for easier ring changes
  • Wide/narrow Q factor cranks for BB30 and GXP
  • Weight: 650 grams with BB
The reports on SRAM's XX1 chain ring set-up have been more than favorable! Over and over again folks have been able to enjoy their favorite rough terrain runs knowing that their chain will be staying put.  As of the time of this write-up, we haven't yet had any personal experience with the system, but it has peaked our interest and after some research, it know on our radar.

What did people do before SRAM XX1? 
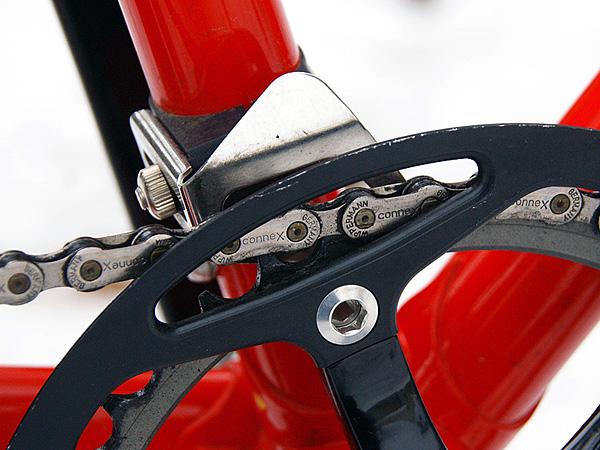
For years the mountain bike community has been dealing with chainsuck by adding gadgets to retain the chain from moving off the chain rings.  IE: chainguides, N-JumpStops, etc. 

Alternatives to SRAM XX1?

Well, yes there are some alternatives, some companies like RaceFace  are now joining the party with their own versions of the "no-jump" chainring; but mostly, the main alternative is still in the form of the guides and stops linked above.  

"*Chainsuck is defined as the moment your chain looses enough tension to physically jumps/drops off the crank chain rings; sometimes this means it falls to the gear below it,  while other times it may jump off to the outside or inside of the chain ring landing on the frame or crank arms."

Have questions, comments, or better intel?  Let us know!

Wednesday, May 16, 2012

GPS: Using a Track vs Route


I've been wondering what the difference between a track and route?   So I did a little research and as it turns out, there is an easy way to explain the difference.
Track or Route, What is the difference? 
Route(s) characteristics:
  • Route is about where you are heading/going ( more of a straight-line representation)
  • It is used in the field to guide you from waypoint to waypoint.
  • It uses straight-line, as the crow flies, navigation. 
Track(s) characteristics:
  • Tracks are about where you have been. (more definitive representation of where you have been)
  • GPS devices record your location based on your settings, usually a value defined by Time or Distance. Electronic "bread crumb trail" if you will.
  • Tracks more accurately reflect the shape of the trail or road you have taken than the straight-line segments representing a route.
Both can be downloaded onto you computer or uploaded to online sites that overlay the information over a map so you can see exactly where you've been on your adventures! 

Wednesday, February 17, 2010

Road Tire / Rim combinations explained

Rims and tires come in all sizes, including varying height and width. While sizes can be easily explained, often the question arises over the confusion between Tubular and Clincher rim / tire combinations.

Here is some general information about the characteristics of both Tubular and clincher variations.

TUBULAR TIRES:
Pros:
Tubular tires are a tube and tire all-in-one, held to the rim using glue.
Tubular tires are used by majority of competitive cyclists for various reasons listed below:
~ lowest rolling resistance
~ lighter than a clincher set up
(Both tubular rims and tires when compared to their clincher counterparts offer a significant weight savings)
~ Use higher tire PSI
~ Safety & stability: While not the best idea, tubular systems are fairly easy to ride on when a flat occurs

Cons:
~ Changing a flat means needing a new tire and time for glue to cure
~ More expensive to maintain due to inability to simply replace or patch a tube when a flat occurs.

CLINCHER TIRES:
Pros:
~ Ease of use for every day riding: Patching or repairing flats can be done road side
~ Tubes and tires are separate, so they can be replaced independent from each other
~ Many tire and tube choices available, all shops should have some tire in stock to fit your clincher rim
Cons:
~ Combination use of inner tube, rim liner, & tire causes heavier weight
~ Clincher rims have more metal used to hold the tire to the rim, adding more weight
~ Materials used in clincher tires can cause higher rolling resistance

2 New Road Alternatives: (TuFo and Tubeless)
TUFO TUBULAR TIRES FOR CLINCHER RIMS:
Fairy new technology, as the name suggests it's allowing for tubular tires to be mounted on clincher rims.
Pros:
~ low rolling resistance, rim liner or glue, offering swift tire changes and less weight
~ the easiest and fastest installation from all types of tires, no tools required
~ immediate use after installation
~ riding quality is close to tubular tires

Cons:
~ Cost
~ Very specialized, so not readily available

Tubeless:
Similar to a car tire, you only need to mount the tire and inflate it without a need for glue or tubes.
Pros:
~ Light weight
~ Ability to run a large range of tire pressures without the worry of flatting
~ More available then TUFO

Cons:
~ Can be hard to inflate on road repair
~ Up to 30% more expensive over standard tires
~ Sometimes needs an additional sealant

Thursday, November 19, 2009

Dressing for Cold Weather

A new discussion on the forums is about dressing appropriately for cool & cold weather riding.

Here's one tip that was shared with me a few years back by Mike Dart, AKA: Dartman.

When dressing in layers, A good rule-of-thumb I to really limit the need to strip them back off during your outing. The main idea is to wear only enough so that you are borderline cool/cold when standing idle outdoors. Almost uncomfortable. This way once you start moving and generating heat, you'll warm up and any extra heat will be allowed to escape the same way the cool air got to you in the beginning.


So whether you need or want to share advice, head over to the Dressing for Cold Weather thread !

Monday, June 9, 2008

Cycling Essentials, Safety, & Gear:

Helmet: No matter what your cycling discipline is, please wear a helmet. In most parks it's a rule. Riding without helmets jeopardize can trail access for everyone. If you see somebody without a helmet, be a friend and remind him or her to get one.

Gloves: Gloves can really help remove some of the stress placed on you palms and protect your hands in the event of a crash.

Shorts, Shirts, & Shoes: There are so many choices it is hard to decide, this is really a personal preference. The important part is to make sure that you feel comfortable in whatever you choose, and make sure you are dressed for the conditions outside!


Hydration & Snacks:
Very important! Be sure to have water bottles or hydration packs. Exercise equals sweating and sweating leads to dehydration. So always carry some water during hot days and/or long rides. It also never hurts to carry a little something like a candy bar, cookies, or energy bars to help put if you bonk on a trail.

Basic Tool Kit:
At minimum you should have some basic tools to fix your bicycle.
While many "standard/automotive" tools can be used to repair your bike, they are many special tools that are sized to work with bike related applications.
Many bike shops carry "multi-tools" which are tools designed to carry with you on your bike while on a ride, these tools are temping to use as your main tool for home use also, but I have to stress that these tools are not designed to be used as everyday tools, so definitely consider purchasing a separate home tool kit.

Home Tool Kit:

~ First, buy yourself a small toolbox that you set to the side just for your bike tool collection. This will keep all your tools organized and keep your "cycling" specialty tools separate from your standard tools.

~ Pumps, there is are two different style tube stems, schrader and presta. So when buying a pump, look for one that will work on both valves.
** Little adapters can be purchased to make presta valves look like a schrader valve.
** Also note that a floor pump is for "home" use, while what are call "mini" pumps are used to carry along on your bike.

~ Tire Levers, buy 2-3 levers so that 1 can act as a pry-bar and the others to remove the tire.
** Consider levers labelled "Steel Core" as they will last longer and the only levers strong enough for very tight rim/tire combinations.
~ Hex/Allen Wrenches (Usually a grouping of 2, 4, 5, 6, 8, & 10 mm are a good start)
~ Quality Phillips & Flat head screwdrivers. (Make sure the tips remain in good condition)

~ MORE to come...

Tools to Carry on a ride or commuter:

Safety tips: Try to always ride with a buddy, but if you can not, it is a good idea to bring a cell phone, or at the very least let somebody know where you are and when you'll be back!